How It Works
Create a Lime CRM Template
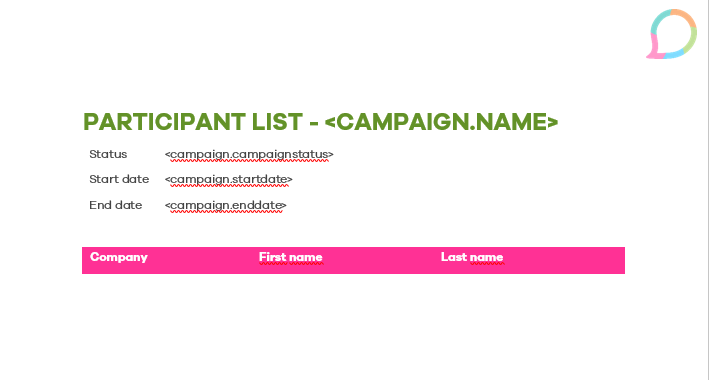
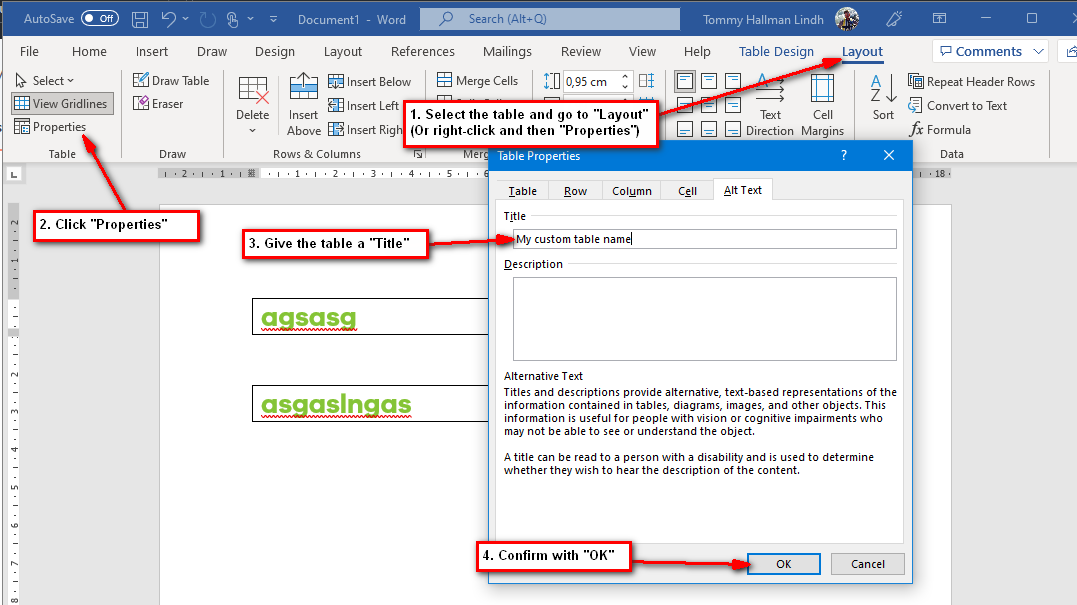
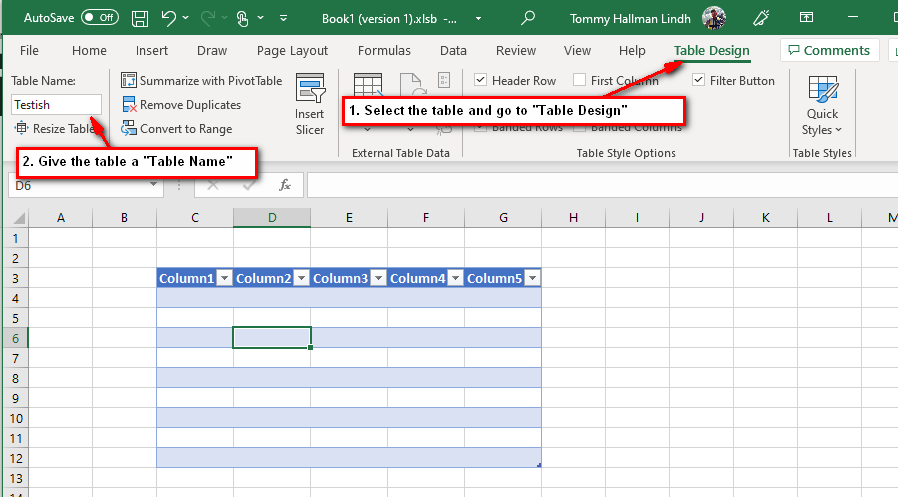
To be able to fetch rows from a subtable you need to add a table with a header to your Word- or Excel template in Template Manager. Design your table as you want with colors, columns and fonts. You must create a Table Template for Lime to know how to use the template.
Create a Table Template
Add the basic configuration
- Display name = The display name under the Template button.
- Main card = Choose which card the template should be visible on (In the dropdown).
- Not based on a main card = Makes it possible to use the template from a tab instead of a card, for example from the main window and export all articles.
- Template type = Choose what kind of document type you want to create, e.g Word or Excel.
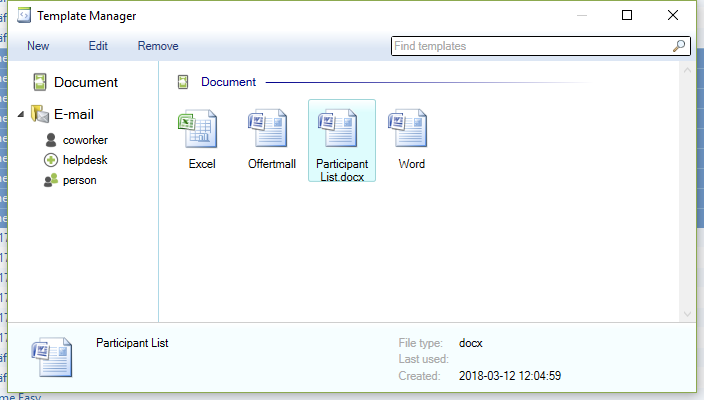
- Template from Template manager = Choose the template you created in the first step
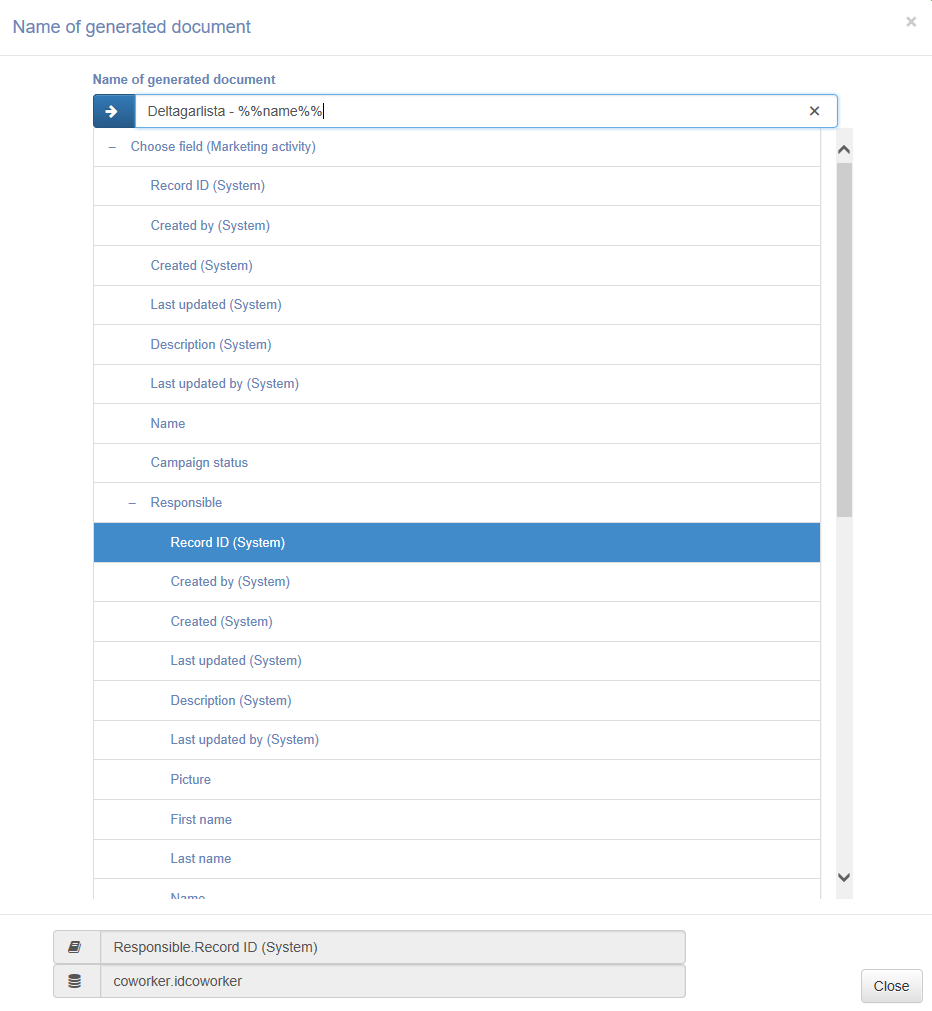
- Name of generated document = Click on the pencil and use the guide to decide the name of the document. You can write free text in the text field, but also use field codes by mark the field you want in the window, and then use the arrow on the left side of the text field to fetch the field code.
- Document type = Choose what kind of document type in Lime you want.
- Inactive = If the template should be visible in the dropdown in the Actionpad or not.
- Save as PDF = If checked the document will be converted to a PDF before it’s saved in Lime. Otherwise it will be a word file.
- Open when done = If checked the created document will open when it's done.
Add tables
- Click on the Tables tab
- Add a table by clicking "+ Add table"
-
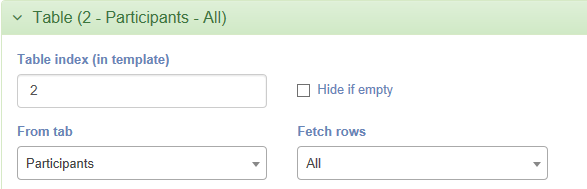
Add the basic configuration for the table
-
Table name (in template) = A reference to the table in the word document in the template manager. Give it a title like the pictures describes.
Word
Excel
-
Hide if empty = If checked the table will be hidden if it contains no data.
- From tab = Choose which tab you want to fetch data
- Fetch rows = Choose which rows you want to check: Filter, Selected rows or All.
-
From filter = If you choose "Filter" in the previous step you must choose which filter it should use.
-
-
Add the number of columns you want by clicking "Add column"
- Column number = The column number in the table, count from left to right and start with 1.
- Text before value = If you want to add a text before the value, for example "$"
- Field name = Click on the pencil on the left side of the field and use the guide to choose field code. Mark the field you want in the window, and then use the arrow on the left side of the text field to fetch the field code.
- Text after value = If you want to add a text after the value, for example "SEK"
- Sum column = If you want the column to sum the values, for example to sum the total price in a price column.
- Image scaling (if image field) = Choose how you want a image field to scale
- Max width (if image field) = Add the max width for the image
- Max height (if image field) = Add the max height for the image

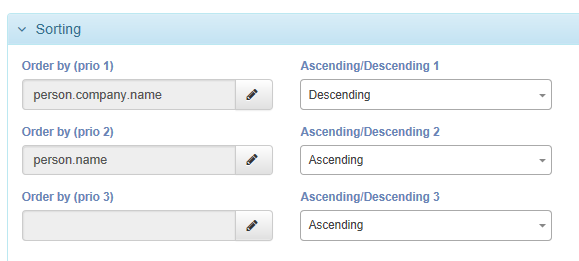
Choose how to sort the table
- Start with "Order by (prio 1)" and click on the pencil on the right side of the field 2. Use the guide to choose wich field the table should sort by 3. Save and close
- Choose how the field should be sorted, e.g. Ascending/Descending
- Continue with prio 2 and 3 if you want to specify more columns that should affect the sorting off the table
Add shapes
- Click on the Shapes tab
- Add a shape by clicking "+ Add shape"
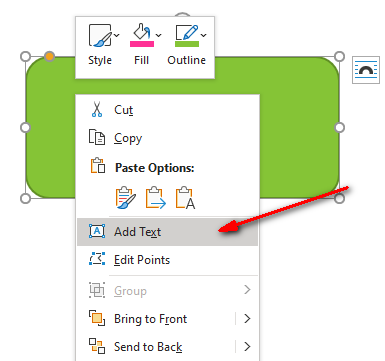
- Add the basic configuration for the shape 1. Shape name = The name of the shape in the word template. 1. Add the shape in your word template. 2. Right click on the shape and choose "Add text" and fill in a name.
 2. Hide if empty = If checked the shape will be hidden if it contains no data. 3. Source = "Field" fetches the picture from the main card, "From filter" from a filter in a tab. 4. From tab = If you choose "First in Filter" in the previous step you must choose which tab the filter appear in. 5. From filter = If you choose "First in Filter" in step 3 you must choose which filter you want to use. 4. Field name = Click on the pencil on the left side of the field and use the guide to choose field code. Mark the field you want in the window, and then use the arrow on the left side of the text field to fetch the field code.
Using a Table Template
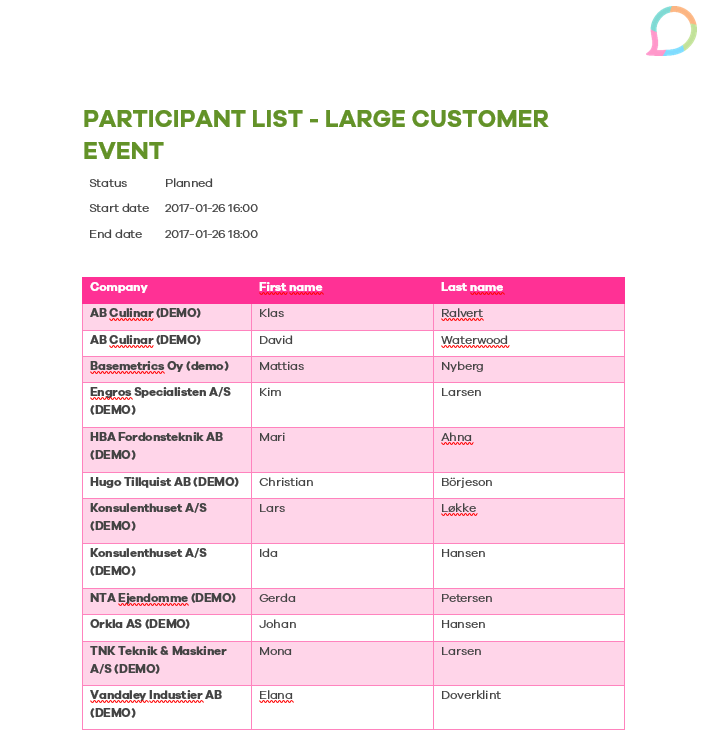
If you look in the Actionpad where you've configured a Table Template you will be able to see a dropdown called Templates where your created templates should be. Below is an example of the Participant list in the campaign Actionpad.

Example of Generated Document